NOTE: OBS Studio Websocket version 5 or higher is required
The OBS Studio connection allows you to directly interact with your instance of OBS Studio to perform changes to scenes and sources. To enable this, you must do the following:
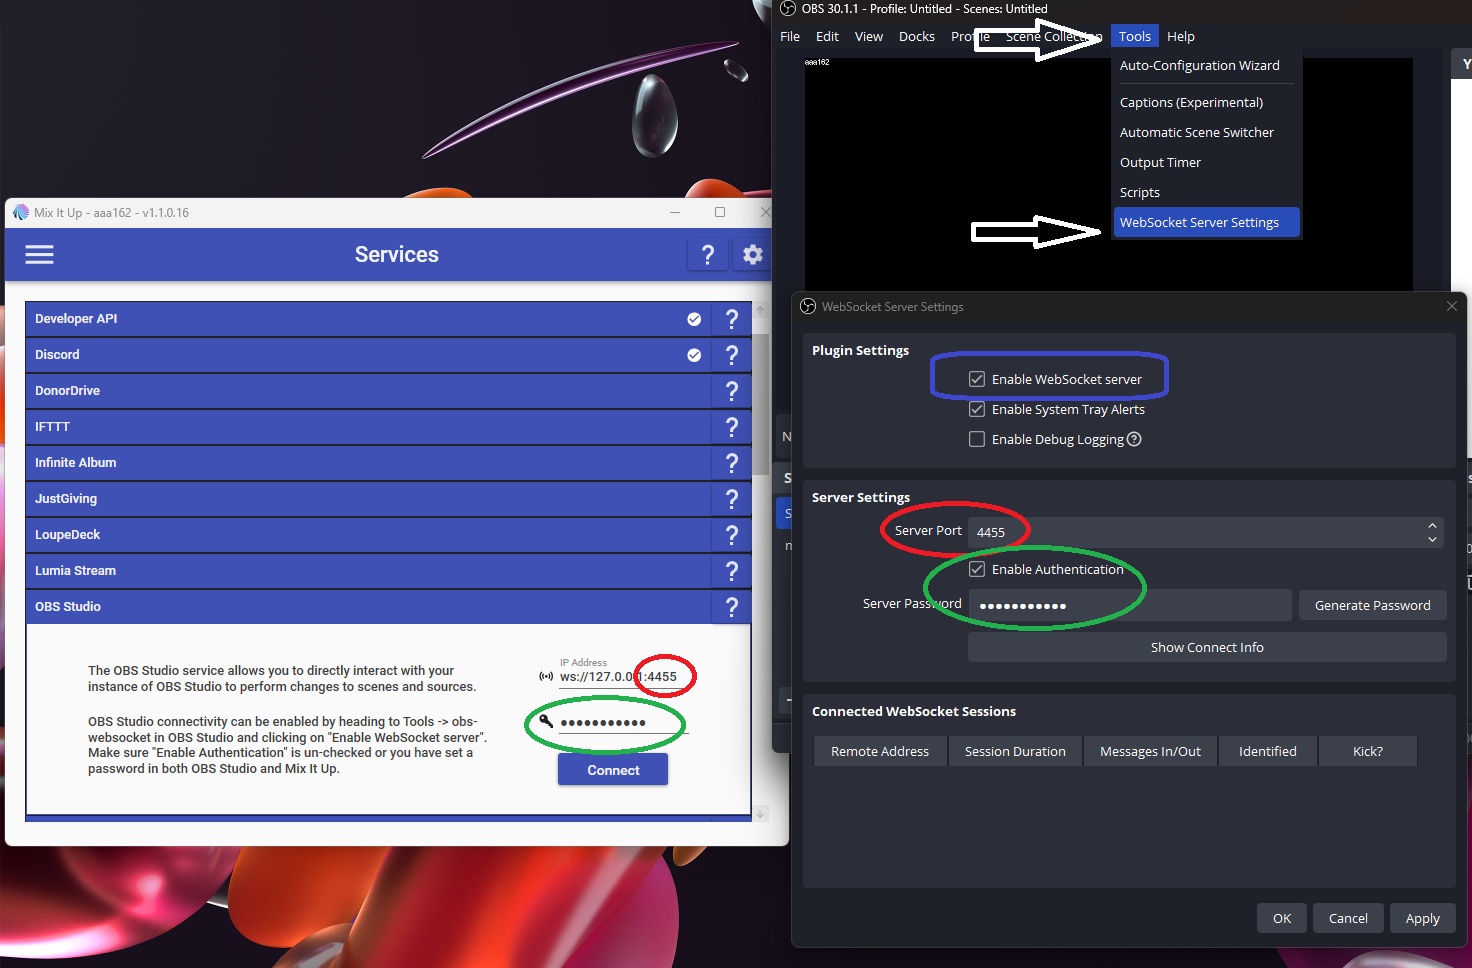
- Start OBS Studio and navigate to Tools -> Websocket server settings, ensure “Enable Websocket server” is checked. You may optionally change the server port and password, but not required.
- If you changed your server port or you enabled authentication and set a password, you must update those values in Mix It Up in the two text boxes as well.
- Click on the “Connect” button.
If you are able to connect successfully, you should see a Windows notification appear stating the connection was successful. You’ll be able to interact with it using Streaming Software Actions
When launching Mix It Up, if OBS Studio is not already running, it will fail to connect as expected. However, Mix It Up will automatically attempt to connect the next time any interaction is attempted with OBS Studio, such as via the Streaming Software Actions.
Common Troubleshooting Steps
In the rare case you experience issues connecting the OBS Studio service, start by checking the following troubleshooting steps:
OBS Studio Connection Failed
If you get an error message saying “Failed to connect to OBS Studio web socket” in Mix It Up, it usually means you missed a step.
-
Start by checking that you have enabled the WebSocket server in Tools -> WebSockets Server Settings
-
Ensure the port number is the same in both Mix It Up and in Websocket Server Settings.
-
If you enabled authentication, make sure the password in both Mix It Up and websocket server settings match. If you forgot your password, change it and then update it in Mix It Up and try connecting the service.