The Microsoft Azure Speech service connectivity allows you to connect your own Microsoft Azure account to circumvent the rate limiting of the default usage of Microsoft Azure Speech with the Text To Speech Action.
Usage of Microsoft Azure Speech for text to speech functionality is a paid service with Microsoft Azure that Mix It Up directly covers, but there are limits to how much we can financially cover for usage of the service across all users. To balance that, we limit the use of Microsoft Azure Speech text to speech to one request every 5 minutes. Users are able to connect their own Microsoft Azure accounts to remove this limitation, but all expenses for Microsoft Azure Speech usage will then be billed to the user’s own Microsoft Azure account.
Testing Microsoft Azure Speech voices
Microsoft Azure Speech voices can be tested outside of Mix It Up by following the instructions below to create a Microsoft Azure account and set up a Speech service. Once done, different voices can be tested by visiting the Speech service page on Microsoft Azure.
Setting up a Microsoft Azure account
- Visit https://azure.microsoft.com to create a free starter account.
- After account creation has finished and you are logged in to the Microsoft Azure main page, click on the “Create a resource” button in the top menu.
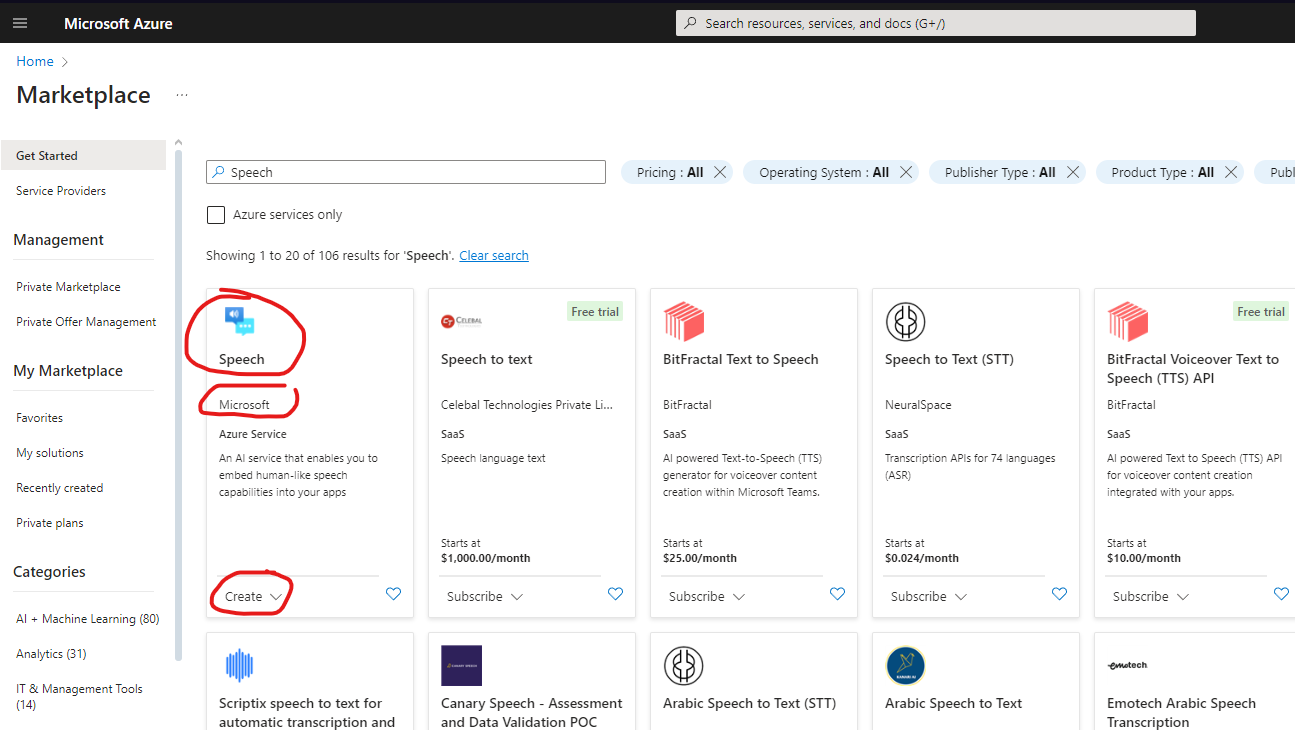
- On the Marketplace page, search for “Speech”, look for the service specifically created by Microsoft, and then click the Create button below it:
- On the creation page, ensure your Microsoft Azure subscription is selected and then either select or create a new resource group.
- Select the region you wish to use, specify a name for the service instance, select a pricing tier, and then click “Review + create”.
- Confirm your details and then click “Create”.
- Once the resource creation has finished, click on the “Go to resource” button.
- On the Marketplace page, search for “Speech”, look for the service specifically created by Microsoft, and then click the Create button below it:
- On the Overview page for the speech service you created, scroll down to the “Keys and endpoints” section:
- Copy both the values for “Key 1” and “Location/Region” somewhere safe for the time being, making note of which is which.
- Return to Mix It Up and head to Services -> Microsoft Azure Speech
- Paste in the “Location/Region” value from step #3 into the “Region Name” text box
- Paste in the “Key 1” value from step #3 into the “Subscription Key” text box.
- Click the Connect button to verify your access is configured correctly
If you encounter an issue in setting up your Microsoft Azure account, please visit the Mix It Up Support Discord for further assistance. When posting a support issue in there, DO NOT SHOW YOUR SUBSCRIPTION KEY as these will provide anyone access to use your Microsoft Azure account’s Speech service.