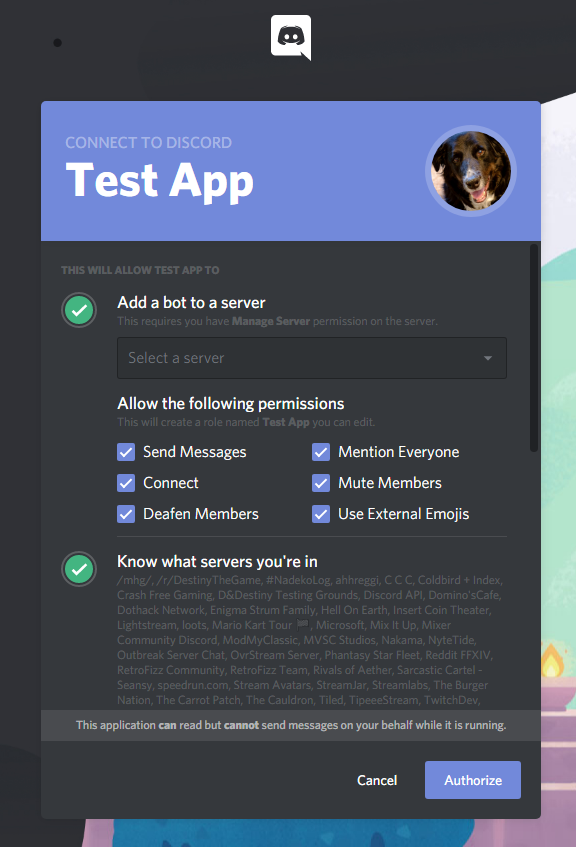
The Discord feature allows you to connect Mix It Up with your Discord server to perform various interactions with it. To connect your Discord server, press the connect button, choose your server, and then complete the setup. You must have either the “Manage Server” or “Administrator” role permissions in the server you are trying to add. After completing the setup, the Mix It Up Discord bot should now appear in your server.
To interact with Discord, you would add a Discord Action to your command. Please be aware that you can only trigger the Discord action once every 30 seconds to prevent spam and ensure we do not get blocked from Discord. You are able to add a custom Discord bot to remove this restriction.
Discord Bot appearing offline?
Don’t worry! The Mix It Up Discord bot does not need to be online 24/7. It will only appear online to send a message, then appear offline again. If you are having issues with messages not sending, check out these troubleshooting steps
Adding Custom Discord Bot
The Discord service has rate-limiting built in to prevent abuse and allow everyone to take advantage of the service. Currently the Discord action has a limit of 1 every 30 seconds. If you perform more than 1 in 30 seconds, they will be prevented from running to ensure we are not blocked from Discord’s servers. If you feel you will need to perform this more than once every 30 seconds, you can create and add your own custom Discord Application, which removes the rate-limiting restriction. To do this, follow the steps below:
-
Head to https://discord.com/developers/applications/ and create a new application. Once you are in, you should see the settings menu on the left side of the dashboard. Open notepad so you can copy a few things to use later.
-
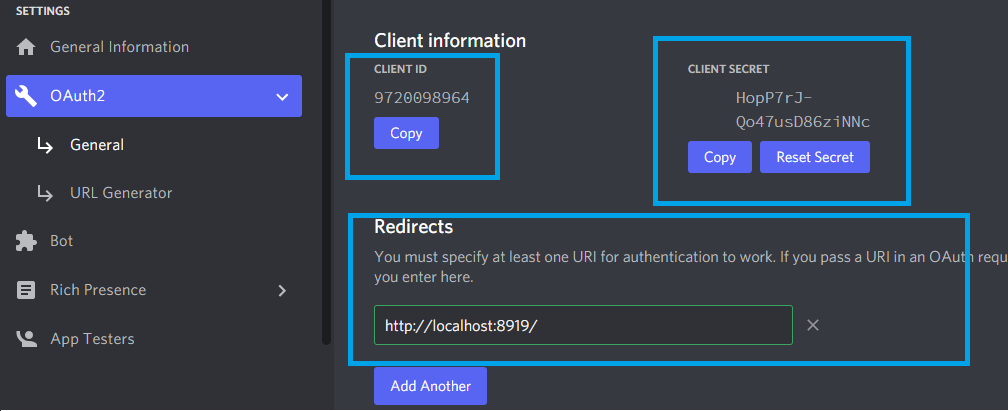
Click on the “OAuth” tab, copy the CLIENT ID and CLIENT SECRET to notepad, and then add the following URL under the “Redirects” section:
http://localhost:8919/. Save.
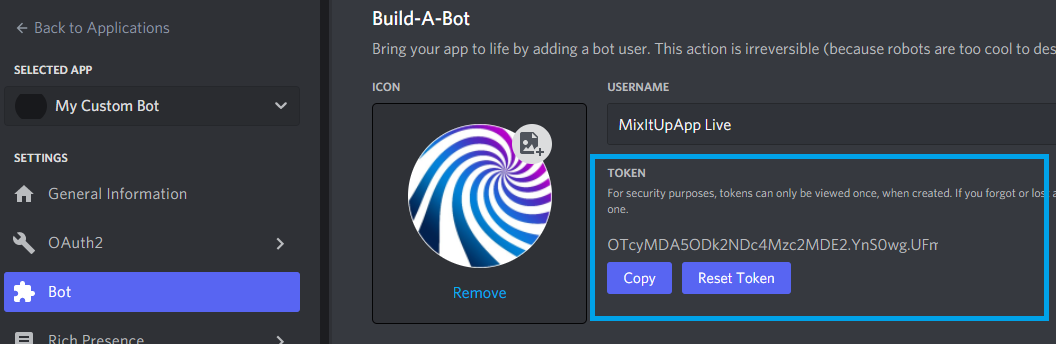
- Click on the “Bot” tab and select the option to create a bot user. Copy the BOT TOKEN to notepad then you can create your bot name and add an avatar. You can skip the rest of the options as they are not needed. Save.
-
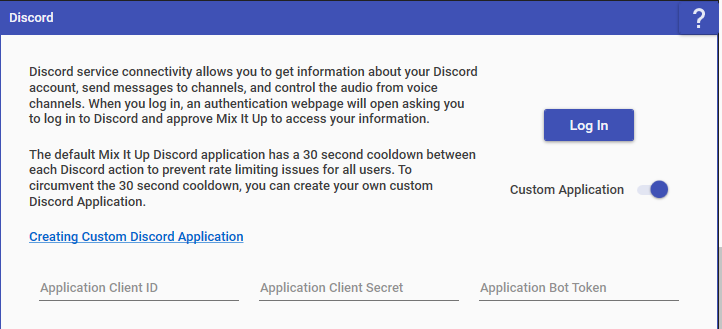
In Mix It Up, head to the services page and select the option for using a custom application. We will now paste the CLIENT ID, CLIENT SECRET, and BOT TOKEN that we copied earlier from:
- Client ID = OAuth 2-> Client ID
- Client Secret = OAuth 2 -> Client Secret
- Bot Token = Bot -> Token
-
Press Log In and if everything has been done correctly, you should see your custom application’s name and picture when attempting to log in.
Discord Action
Discord actions allow you to interact with your logged in Discord server via either the Mix It Up Discord bot or your own custom Discord bot.
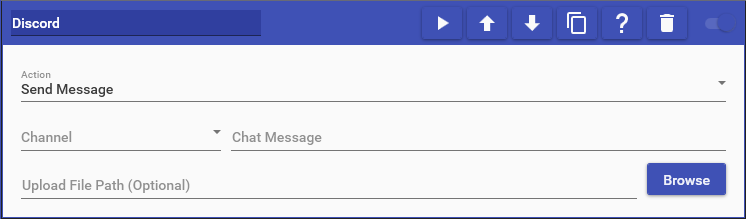
This action supports the following options:
- Send Message: Allows you to send a message to a Discord channel and can include Special Identifiers in your message. You can also additionally supply the path to a file to upload alongside your message.
- Mute/Unmute Self: Allows you to mute/unmute your microphone in your Discord server.
- Deafen/Undeafen Self: Allows you to deafen/undeafen your sound output in your Discord server, which will effectively mute any sound coming from Discord.
- Send Embed Allows you to send an Embed message to a Discord channel and can include Special Identifiers in your message. You can also additionally supply the path to a file to upload alongside your message.
Tagging Discord Roles
Tagging a custom role in Discord is possible, but you must use the ID of the role as opposed to the name of the role. To get access to the ID for a role, you must first enable the Developer Mode option in the User Settings menu under App Settings -> Advanced. Once this is enabled, head to your server’s role list in the Server Settings menu under Roles. Right-click the role you are looking to tag and select “Copy ID”.
Tagging a custom role by its ID uses the format <@&roleid>, where “roleid” is the ID that was copied from the Roles menu for your server settings. For example, if your role ID was “1234”, then you would use the following to tag that role: <@&1234>
NOTE: The steps above are for custom roles. To tag default roles like everyone or here, simply type @everyone or @here without using the role ID.
Messages Not Sending
Messages failing to send usually mean it is a permission issue in your server. The bot must at least have the “View Channel” and “Send Messages” permissions in its role especially when posting in private or locked channels like #announcements or #going-live.
A simple test would be to grant the bot administrator permissions in your server and test again. If it works now, it was a permission issue. You will need to check the role permissions for the specific channel settings as well as the roles section in your server settings. Now scale back the permissions as needed as it is bad practice to grant administrator permissions unless absolutely required to function, and the MIU Discord bot does not require them. If you need additional assistance, join our Discord server.
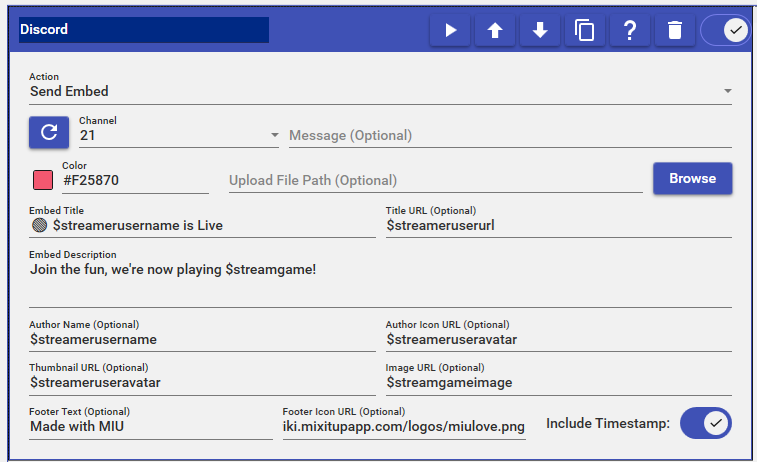
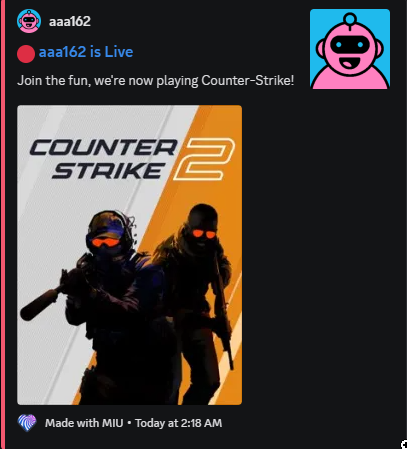
Embed Messages
Sending an embed message on Discord is very simple. Many of the fields will have (optional) labels, and those do not need to have anything in there if you dont want. Below is an example of the Discord action and the result that is sent to the Discord channel.